
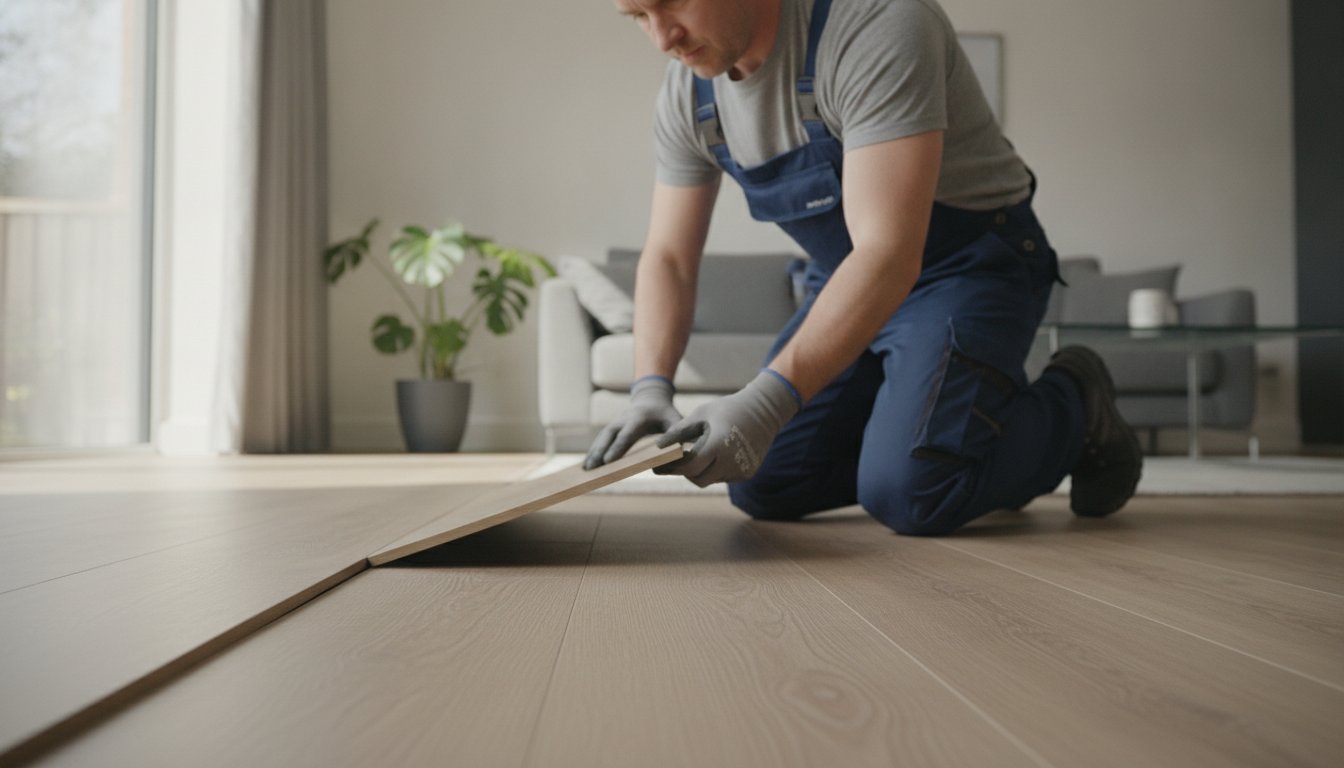
You've spent weeks selecting the perfect Luxury Vinyl Tile for your home, only to notice the edges curling up like old wallpaper just months later. It's incredibly frustrating to watch a beautiful investment start to look like a failed project; especially when you're worried about tripping hazards or water damage. You're likely wondering, why is my vinyl floor lifting at the edges, and feeling like the material itself has let you down.
We understand that a floor should provide security and pride, not a constant source of stress. The truth is that lifting edges are rarely a fault of the product itself. Instead, they're usually a symptom of what is happening underneath. In this article, we'll explain the technical reasons behind these failures, including the critical role of moisture testing and adhesive selection. You'll learn how professional subfloor preparation prevents these costly issues and ensures a flat, seamless finish that lasts for decades. We'll also help you understand how a seasoned local fitter can assess the damage and put things right.
Key Takeaways
- Understand why proper material acclimatisation and selecting the right adhesive for your specific room's environment are essential for a long-lasting finish.
- Identify the technical reasons behind why is my vinyl floor lifting at the edges, focusing on the critical role that foundational subfloor preparation plays in preventing failure.
- Learn how environmental factors like direct sunlight in south-facing rooms require specialist high-temperature adhesives to prevent unsightly edge curling.
- Discover how common cleaning habits, such as using steam mops or harsh chemicals, can inadvertently damage the adhesive bonds at the seams of your Luxury Vinyl Tiles.
- Determine whether your floor needs a simple localised repair or if a systemic subfloor issue requires a professional assessment from a seasoned fitter.
Common Reasons Why Vinyl Flooring Lifts at the Edges
Finding the answer to why is my vinyl floor lifting at the edges often requires looking beneath the decorative surface. Whilst Luxury Vinyl Tiles (LVT) and standard vinyl are designed for durability, they are precision-engineered materials that react to their surroundings. If the installation skips the essential foundational steps, the floor will eventually protest. The chemical makeup of modern Vinyl composition tile and LVT means these products are susceptible to adhesive failure if environmental conditions aren't managed correctly from day one.
We often find that lifting edges are the result of a "perfect storm" of factors. These include:
- Incorrect Adhesive: Using a standard glue in a south-facing room or a sun-drenched conservatory where high-temperature adhesives are required.
- Subfloor Neglect: Failing to address an uneven or dusty subfloor which prevents the glue from forming a permanent bond.
- Temperature Fluctuations: Drastic changes in room temperature that force the material to move more than the adhesive can handle.
The Importance of Acclimatisation
Vinyl is a flexible material that expands and contracts based on the temperature of the room. We always insist that flooring sits in its intended environment for at least 24 to 48 hours before the first tile is laid. This process, known as acclimatisation, allows the material to reach a stable state. If you fit a cold floor into a warm room, or vice versa, the material will change shape after it's been glued down. This creates internal tension that eventually pulls the edges away from the subfloor, leading to that frustrating curling effect. Fitting flooring in a cold house whilst the heating is turned off is a recipe for future failure.
Moisture Ingress and Curling
Water is the most common enemy of any flooring installation. When we talk about moisture, we aren't just referring to accidental spills. Moisture often attacks from two directions. First, there is surface moisture; frequent wet mopping or the use of steam mops can force water into the tiny seams between tiles. This breaks down the adhesive at the most vulnerable point: the edge.
Second, and more seriously, is moisture rising from the subfloor. In many older British homes, concrete subfloors lack a modern Damp Proof Membrane (DPM). Without this barrier, ground moisture seeps into the adhesive layer, causing it to emulsify and lose its grip. This creates a moisture imbalance where the bottom of the tile stays damp whilst the top stays dry, forcing the edges to curl upwards in a classic "cupping" motion. Addressing this requires professional subfloor preparation to ensure the foundation is bone dry before any material is laid.
The Critical Role of Subfloor Preparation and Screeding
Many homeowners focus on the colour and texture of their Luxury Vinyl Tiles, but the true secret to a floor that stays flat lies in the foundation. At GW Flooring, we've spent over 20 years perfecting the "invisible work" that happens before the first tile is ever laid. When people ask why is my vinyl floor lifting at the edges, the answer is almost always found in the subfloor. If the base isn't perfectly flat, the rigid vinyl tiles will bridge over small dips or humps. This creates a "spring" effect; every time you walk across the floor, the tiles flex, eventually pulling the edges away from the adhesive bond.
Proper subfloor preparation isn't just a recommendation; it's a requirement for a professional finish. We treat every room as a unique technical challenge, ensuring the substrate is clean, dry, and structurally sound. If the foundation is neglected, even the most expensive Karndean or Amtico products will eventually fail.
Screeding for a Perfect Finish
For concrete bases, we utilise high-quality self-levelling compounds to create a mirror-smooth surface. This screeding process eliminates the minute imperfections that cause adhesive failure. Without a smooth surface, the glue cannot achieve a 100% "grab" on the back of the tile, leaving weak spots where the edges can begin to curl. You can learn more about our meticulous approach in our guide to Professional LVT Flooring Installation in Essex.
Plyboarding Timber Floors
When we work in Rayleigh homes with timber floorboards, the approach shifts to plyboarding. We use 6mm flooring-grade plywood, which is far superior to the low-quality options found in standard DIY stores. Standard floorboards naturally move and flex; if you glue vinyl directly to them, the seams will open up and the edges will lift as the wood beneath breathes. By installing a solid, stable layer of high-grade ply, we create a unified surface that prevents movement from reaching your beautiful new floor. This discipline ensures that your investment remains as stunning as the day it was fitted.
If you're worried about a failing floor or planning a new project, we can help. Our team provides a professional flooring assessment to ensure your subfloor is ready for a lifetime of use.
Installation Errors: Adhesive Failure and Expansion Gaps
Whilst we've established that the foundation is paramount, the way the material is bonded to that foundation is the next critical step. When we investigate why is my vinyl floor lifting at the edges, we often find that the adhesive was either the wrong specification or applied with poor technique. Professional flooring isn't just about sticking tiles down; it's about managing chemical bonds and environmental physics. Many people believe that applying "more glue" will result in a stronger floor, but the opposite is often true. Excess adhesive can lead to "adhesive ooze," where the glue never cures correctly and actually lubricates the tile, allowing the edges to slide and curl upwards over time.
The technical secret to a successful bond lies in "open time." This is the specific window after the glue is spread when it becomes tacky enough to grab the tile. If a fitter lays the floor too early, the moisture in the glue gets trapped, leading to bubbles and edge failure. If they wait too long, the adhesive "skins over" and loses its ability to grip. Once your floor is correctly bonded, it’s vital to properly clean your vinyl floors to ensure no excess moisture works its way into the seams before the bond has fully crystallised.
High-Temperature Adhesives for Essex Conservatories
In our local area, we see many beautiful conservatories and kitchens with large bifold doors. These spaces are prone to intense UV heat. Standard pressure-sensitive adhesives often soften when they reach high temperatures, causing the tiles to shift. For these "high-sun" areas, we always use specialist high-temperature (HT) adhesives. These are specifically engineered to remain rigid even when the floor surface heats up, preventing the thermal expansion that leads to unsightly edge curling in south-facing rooms.
Managing the internal climate of these sun-drenched rooms is a vital part of floor preservation; for those looking for broader home renovation inspiration, you can explore Double Hung Windows to see how quality glazing solutions help regulate temperature and light.
The Necessity of Perimeter Gaps
Every floor needs room to breathe. Even though Luxury Vinyl Tiles are incredibly stable, they still undergo minute changes in size due to temperature fluctuations. If a floor is fitted tight against the walls or skirting boards, it has no room to expand. This built-up pressure has to go somewhere, and it usually results in the floor "peaking" or lifting at the weakest points: the edges and seams. We use specific spacers during the installation process to maintain a consistent expansion gap around the entire perimeter. This small gap is the difference between a floor that stays flat for twenty years and one that fails in twelve months. We then hide this gap with your skirting or a colour-matched silicone for a seamless, professional finish.

Environmental Triggers: Maintenance and Cleaning Habits
Even the most meticulously installed floor can fall victim to the wrong maintenance routine. We've seen many instances where the foundation was perfect and the adhesive was top-tier, yet the edges began to curl within a year. If you're still asking why is my vinyl floor lifting at the edges after a seemingly perfect install, your cleaning cupboard might hold the answer. Protecting your flooring investment requires a move away from aggressive cleaning methods toward a more disciplined, gentle approach that respects the chemical bonds holding your floor in place.
A floor is a living part of your home's ecosystem. It reacts to the tools you use and the chemicals you apply. Harsh, bleach-based cleaners or abrasive scouring pads don't just clean the surface; they can slowly degrade the protective wear layer and seep into the seams. Once the chemical bond of the adhesive is compromised at the edge, the structural integrity of the entire plank is at risk.
Why Steam Mops Are the Enemy of Vinyl
Steam mops are frequently marketed as the ultimate hygienic solution for modern homes, but they are the primary cause of edge lifting in LVT. The mechanism is simple but destructive. These devices force high-pressure, super-heated steam directly into the microscopic seams between your tiles. This heat softens the adhesive whilst the moisture gets trapped underneath the wear layer. Over time, this leads to delamination; a permanent failure where the top layers of the vinyl actually separate from the base. We always recommend using a damp microfibre mop and a manufacturer-approved pH-neutral cleaner instead. Saturated mops that leave standing water on the floor are just as dangerous, as liquid can seep into the edges and emulsify the glue.
Underfloor Heating Considerations
Underfloor heating (UFH) provides a wonderful level of comfort, but it must be managed with care to ensure vinyl stability. Most Luxury Vinyl Tile manufacturers, including Karndean and Amtico, specify a maximum surface temperature of 27°C. Exceeding this limit can cause the tiles to expand beyond their design tolerances, putting immense pressure on the perimeter gaps. It is also vital to follow a slow "ramp-up" procedure. After a new installation, the heating should remain off for at least 48 hours and then be increased by only a few degrees each day. This allows the adhesive to fully crystallise without being shocked by sudden heat. For more detailed advice on managing your new system, see The Essential Guide to Professional Floor Installation.
Organising a proper cleaning routine is the best way to ensure your floor remains a source of pride for years to come. If you're unsure whether your current habits are causing damage, we can help. Contact our team for a professional maintenance assessment to keep your home looking its best.
How to Fix Lifting Edges and When to Call a Specialist
Once you've identified why is my vinyl floor lifting at the edges, the next decision is whether to attempt a home repair or call in an expert. A single lifting tile in a doorway might be a simple fix, but multiple curling edges across a room often signal a systemic failure. We believe in transparency; sometimes a floor can be saved with a surgical repair, whilst other times, continuing to patch a failing subfloor is simply throwing good money after bad. A professional eye can distinguish between a minor adhesive lapse and a "blown" screed that has lost its structural integrity.
A failed floor is more than just an eyesore; it's a tripping hazard and a place where bacteria can thrive. Assessing the damage early can prevent moisture from spreading further under the planks, potentially saving you from a much larger bill later. If you notice the floor feels "bouncy" or "crunchy" when you walk on it, the issue is almost certainly foundational rather than just a loose edge.
The Professional Assessment Process
Step-by-Step Minor Edge Repair
If the damage is localised and the subfloor is bone dry, you can attempt a minor repair. Follow these steps to ensure the bond holds:
- Clean the Cavity: Carefully lift the edge and use a vacuum or soft brush to remove every grain of dust and old, brittle adhesive. Glue won't bond to debris.
- Apply Specialist Adhesive: Don't use generic "super glue." Use the specific adhesive recommended by the manufacturer for that material type.
- Apply Pressure: After allowing the correct open time for the glue to become tacky, press the tile down. Place a heavy, flat object over the edge for 24 hours whilst the bond cures.
Whilst DIY fixes can work for small areas, they often mask larger issues like rising damp. Our "showroom-to-you" service is designed to eliminate this guesswork. We bring our expertise and samples directly to your home, providing a frictionless way to assess the damage and realise a new vision for your living space. If you're tired of tripping over failed edges, book a complimentary flooring assessment with our team today. We'll help you secure a flat, beautiful finish that brings pride back to your home.
Secure a Flawless Foundation for Your Home
Understanding why is my vinyl floor lifting at the edges is the first step toward reclaiming a beautiful and safe living space. As we've explored, the secret to a long-lasting finish isn't just the tile itself; it's the meticulous subfloor preparation and environmental management that happens behind the scenes. Whether it's choosing high-temperature adhesives for sunlit rooms or ditching the steam mop to protect your seams, small changes in installation and care make a world of difference to the longevity of your floor.
We've spent over 20 years serving our local Essex community as a family-run business. Whilst we are specialists in premium products like Amtico and Karndean, our true pride lies in the "invisible work" that ensures your floor stays flat and secure for decades. Don't let a failed installation compromise your home's safety or style. We're here to help you find a permanent solution rather than a temporary patch.
Book your free home flooring assessment in Rayleigh today and let our experienced fitters evaluate your subfloor. We look forward to helping you realise your design vision with a floor that remains a source of pride for years to come.
Frequently Asked Questions
Can I glue down vinyl floor edges that are lifting myself?
You can perform minor repairs yourself if the issue is localised and the subfloor is bone dry. It's essential to clean out all old adhesive and debris before applying a fresh, manufacturer-recommended bond. However, if the lift is widespread, it often indicates a deeper subfloor failure that requires a professional assessment to ensure the fix lasts. We always advise checking for moisture before attempting any DIY re-gluing.
Why is my LVT flooring popping up in the middle of the room?
Popping or "peaking" in the centre of a room is typically caused by a lack of expansion gaps at the perimeter. When Luxury Vinyl Tiles expand due to heat, the material has nowhere to go and is forced upwards at the seams. This can also be a sign of rising damp emulsifying the glue beneath the tiles, which creates air pockets and structural instability that requires immediate attention.
Will a steam mop really ruin my vinyl flooring?
Yes, steam mops are a major contributor to flooring failure and should be avoided. The high-pressure steam forces moisture into the seams, which can emulsify the adhesive and cause delamination of the wear layer. We always recommend a damp microfibre mop and a pH-neutral cleaner to keep your floor in peak condition without risking the integrity of the bond or the beauty of the finish.
How do I fix a gap between my vinyl flooring and the skirting board?
Gaps at the skirting are often a result of the floor shrinking after being fitted without proper acclimatisation. If the gap is within a small tolerance, it can be neatly finished with a colour-matched flexible sealant or scotia beading. However, if the gap is widening significantly, it might suggest the adhesive has failed and the tiles are shifting, which may require a professional to re-secure the perimeter.
Is it normal for vinyl floors to expand and contract in Rayleigh weather?
It is completely normal for vinyl to move slightly as temperatures change throughout the year. In Rayleigh, where we see varied seasonal weather, the material will expand in summer and contract in winter. This is exactly why we insist on a 48-hour acclimatisation period and precise perimeter gaps during every professional installation to ensure these natural movements don't lead to floor failure.
What is the best adhesive for luxury vinyl tiles in a conservatory?
High-Temperature (HT) adhesive is the only safe choice for conservatories and south-facing rooms with bifold doors. Standard pressure-sensitive glues can soften under intense UV heat, leading to tiles shifting or curling at the edges. An HT adhesive creates a rigid, heat-resistant bond that keeps your tiles perfectly in place even during the hottest Essex summers, providing a secure and durable finish.
How much does it cost to have a professional fix my lifting floor in Essex?
The cost of a professional repair depends entirely on the root cause of the damage and the extent of the area affected. A simple re-bonding of a few edges is a relatively minor job, whereas addressing a systemic subfloor moisture issue or a "blown" screed requires more extensive foundational work. We provide a complimentary home assessment to give you a clear, honest breakdown of what is required for your specific floor.
How long should I wait before walking on a repaired vinyl edge?
We recommend waiting at least 24 hours before walking on or placing furniture over a repaired edge. This window allows the adhesive to fully crystallise and form a permanent bond with the subfloor substrate. Walking on it too early can cause the tile to shift or slide, which might lead to you wondering why is my vinyl floor lifting at the edges all over again just weeks later.


