What if the secret to a floor that looks brand new for twenty-five years isn't just how you clean it, but the invisible work happening beneath your feet? We understand that choosing a premium floor like Amtico or Karndean is a significant investment in your home's character. It's completely natural to feel a sense of worry when you see heavy furniture being moved or hear the frantic scurry of a pet across the hall. You want to know how to prevent scratches on LVT flooring without spending every weekend worrying about your shoes, especially when the conflicting advice on cleaning products can feel so confusing.
In this guide, we'll share the professional strategies we've developed over twenty years as a family-run specialist in Rayleigh. We will help you move past the fear of accidental damage by establishing a simple, effective protection routine that fits your lifestyle. You'll learn why a 20 mil wear layer is the gold standard for 2026 and how meticulous subfloor preparation acts as your first line of defence against surface wear. From choosing the right felt pads to knowing when a scuff requires a professional touch, we're here to ensure your Essex home stays as pristine as the day we finished the installation.
Key Takeaways
- Understand why the polyurethane (PU) wear layer is your floor's invisible shield and how selecting the correct thickness ensures long-term durability.
- Learn the essential daily habits for how to prevent scratches on LVT flooring, from the "Entrance Mat" rule to using heavy-duty castor cups under furniture.
- Identify the common cleaning mistakes, such as using steam mops or vacuum beater bars, that can compromise the protective finish of your Luxury Vinyl Tiles.
- Discover how professional subfloor preparation acts as the ultimate defence against surface damage and the risk of subfloor telegraphing.
- Recognise the difference between surface scuffs and deep scratches, and learn when a professional "strip and refresh" can restore your floor to its original beauty.
Understanding the LVT Wear Layer: Why Prevention is Better Than Cure
Many Rayleigh homeowners choose Luxury Vinyl Tile (LVT) because it offers the perfect marriage of aesthetic beauty and practical durability. It's the go-to choice for busy Essex households that want the look of natural oak or stone without the high-maintenance upkeep of the real thing. However, understanding how to prevent scratches on LVT flooring starts with knowing exactly what you've put underfoot. Professional fitting ensures this material performs as intended, but your daily habits determine how long that "just installed" glow actually lasts.
We often hear the term "scratch-proof" in showrooms, but in our twenty years of experience, we prefer to be honest. LVT is exceptionally scratch-resistant, not indestructible. The secret lies in the polyurethane (PU) wear layer. This is an invisible, high-performance shield that sits on top of the design layer. Think of it as a sacrificial barrier. Its job is to take the brunt of daily life so the beautiful photographic print beneath remains untouched. Learning how to prevent scratches on LVT flooring is mostly about protecting this specific layer from abrasive forces that can dull its finish over time.
During our "showroom to you" service, we often discuss wear-layer thickness with clients. For most residential areas, a 0.55mm wear layer is excellent. If you have a particularly hectic home with large pets or high-traffic hallways, stepping up to a 0.7mm commercial-grade layer provides an extra margin of safety. Selecting the right grade at the start is a vital step in your long-term protection strategy.
The Anatomy of a Luxury Vinyl Tile
LVT isn't just a single sheet of plastic. It's a precision-engineered product consisting of several distinct layers: the heavy-duty backing, a glass-fibre stability layer to prevent warping, the high-definition photographic layer, and finally, the PU coating. The wear layer acts as the primary sacrificial barrier against micro-scratches that occur over time. Light refraction makes micro-scratches far more visible on high-gloss finishes because the light bounces off the edges of every tiny groove. If you want a floor that hides the signs of a busy life, matte wood-effect textures are much more forgiving than polished stone styles.
Common Causes of LVT Scratches in British Homes
Proactive Strategies to Prevent Scratches on LVT Flooring
We've established that the polyurethane wear layer is your floor's primary defence, but the most effective protection starts before a single grain of grit touches the surface. Prevention isn't just about cleaning; it's about controlling the environment. Learning how to prevent scratches on LVT flooring involves a combination of the right accessories and a few simple household habits. By creating a barrier between your floor and the outside world, you ensure your investment remains in showroom condition for decades.
Creating a Grit-Free Zone
Rayleigh winters can be particularly tough on floors. The local Essex clay and loose grit from driveways act like liquid sandpaper if they're tracked inside. We recommend a two-mat system to tackle this. Place a coarse, heavy-duty mat outside your entrance to scrape off the worst of the mud. Follow this with a soft, absorbent internal mat to catch any remaining moisture and fine particles.
You must be careful with your choice of matting. Avoid cheap rubber-backed mats at all costs. These often cause "plasticiser migration," a chemical reaction that leads to permanent yellow staining on your Luxury Vinyl Tiles. Instead, choose mats with natural jute or synthetic backings specifically labelled as LVT-safe. Implementing a "shoes-off" policy is another simple, free way to eliminate the tracking of sharp particles that could compromise the PU coating.
Furniture Safeguards: Pads, Castors, and Cups
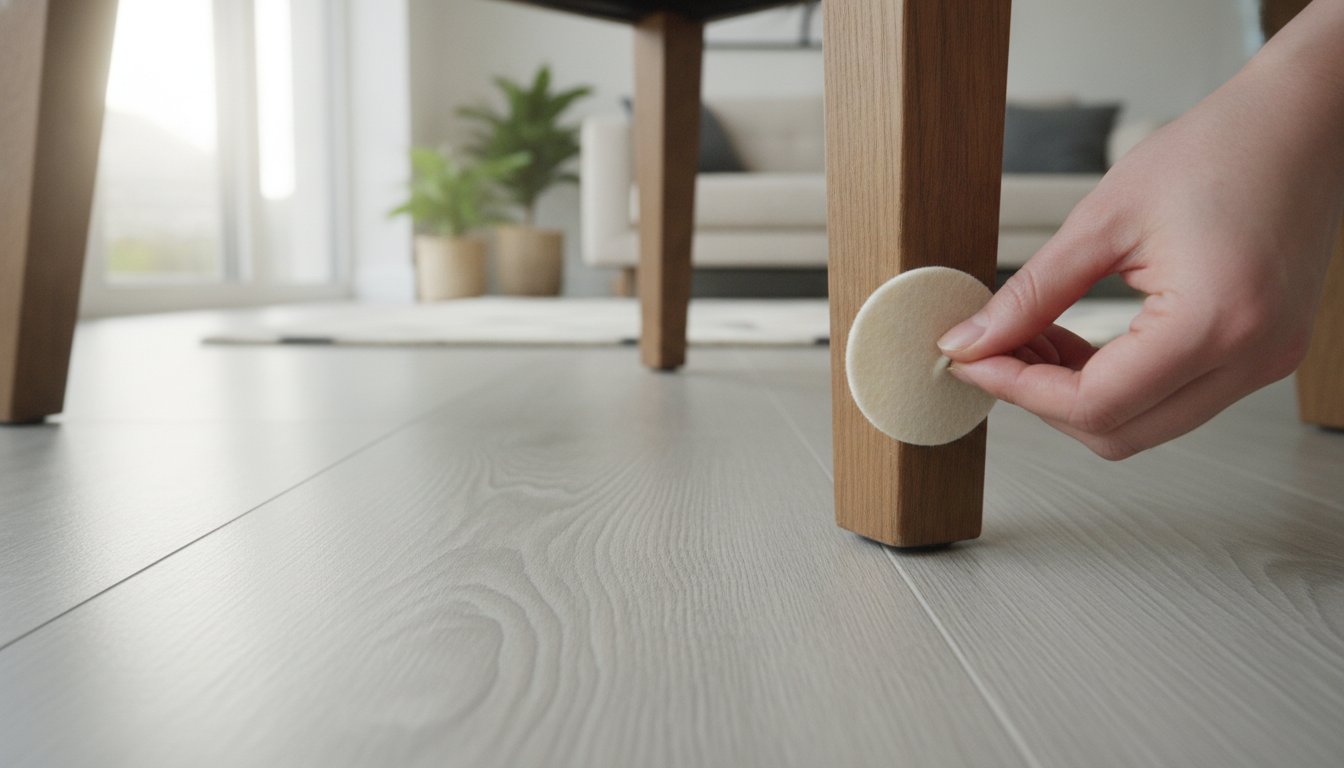
Moving a dining chair or a sofa is one of the most common ways to cause deep gouges. Whether you have just purchased a premium velvet seat from Grosvenor Furniture or are rearranging your existing layout, we always advise using high-quality adhesive felt pads on every piece of furniture. We prefer adhesive pads over nail-on versions; if a nail-on pad wears through or becomes loose, the metal nail will immediately destroy your floor.
- Heavy Items: For pianos, sideboards, or large sofas, use wide-base castor cups. These distribute the weight over a larger area, preventing indentations and scratches.
- Office Chairs: The hard plastic wheels found on standard office chairs are notorious for causing "swirl" scratches. Replace these with rubberised, LVT-friendly wheels for a smoother, safer glide.
- The "Lift, Don’t Slide" Rule: It sounds basic, but training everyone in the house to lift furniture rather than dragging it is vital. If an item is too heavy to lift, place a piece of plywood or a dedicated furniture slider underneath to protect the surface whilst you move it.
If you're currently choosing your flooring and want to see which wear layer thickness is best for your home's traffic levels, our showroom-to-you service allows you to compare different Amtico and Karndean samples in your own light. Finally, don't forget your pets. Keeping dog and cat claws trimmed is a simple habit that prevents the high-speed "zoomies" from leaving marks on your beautiful new floor.
Maintenance and Cleaning Habits for a Scratch-Free Surface
Establishing a consistent cleaning rhythm is the most effective way to preserve the factory finish of your Luxury Vinyl Tiles. Whilst the wear layer we discussed earlier provides a robust shield, its greatest enemy is the microscopic grit that accumulates during daily life. To keep your home looking its best, we recommend a "grit-first" approach to maintenance. By prioritising the removal of abrasive particles before they can be ground into the surface by foot traffic, you are mastering the most practical aspect of how to prevent scratches on LVT flooring.
The Correct Way to Vacuum and Sweep LVT
To maintain a flawless surface, daily sweeping in high-traffic areas like kitchens and hallways is essential. We always suggest using a soft-bristle broom specifically designed for hard floors. If you prefer to vacuum, you must ensure the beater bar is switched off. A spinning beater bar, designed to agitate carpet fibres, can cause permanent micro-swirls on a vinyl surface. Always set your vacuum to "hard floor" mode to ensure only the suction and soft brushes contact the tiles.
Safe Cleaning Solutions and Avoidance List
Choosing the right chemicals is just as important as the tools you use. Many off-the-shelf domestic cleaners contain harsh bleach or abrasive chemicals that can gradually strip away the PU coating. We always recommend using pH-neutral cleaners, such as those specifically formulated by manufacturers like Amtico or Karndean. These solutions effectively lift dirt without compromising the floor's integrity.
- Avoid Steam Mops: These are a major cause of floor failure. The intense heat can weaken the adhesive bond beneath the tiles, leading to "peaking" where the edges of the planks begin to lift and curl.
- Say No to "Mop and Shine" Products: These often leave a sticky, acrylic residue. This film actually traps grit against the floor, making it harder to clean and increasing the risk of surface scratches.
- Skip Abrasive Scourers: Never use green scouring pads or steel wool on a stubborn mark. A soft microfibre cloth and a bit of "elbow grease" with a pH-neutral solution is all you need.
For an extra layer of security, you might consider applying a professional-grade dressing. These sacrificial coatings act as an additional transparent skin, taking the brunt of micro-abrasions so the wear layer remains untouched. It’s a simple step that adds years to the lifespan of your floor, ensuring your home continues to reflect the pride you take in it.

The Professional Difference: How Installation Prevents Scratches
Most homeowners focus on the surface, but as seasoned craftsmen, we know that the longevity of your floor is decided before the first tile is even laid. While daily cleaning and protective mats are vital, the ultimate answer to how to prevent scratches on LVT flooring often lies in the quality of the foundation. If the subfloor isn't perfect, the tiles will never sit correctly, leading to a range of structural issues that eventually compromise the protective wear layer.
One of the biggest risks to your investment is "subfloor telegraphing." This occurs when tiny imperfections, such as grit, old adhesive ridges, or uneven floorboards, "telegraph" through the flexible vinyl. These create subtle high points on the surface. Because these points sit slightly higher than the rest of the floor, they take the brunt of the impact from foot traffic and furniture, causing the PU coating to wear away prematurely in specific spots. Professional adhesives also play a role here; they prevent tile movement and the internal friction that can lead to surface dulling.
Subfloor Preparation: Screeding and Plyboarding
We believe that proper subfloor screeding or plyboarding is non-negotiable for a scratch-free finish. A perfectly level surface ensures that the weight of heavy furniture is distributed evenly across the entire tile rather than being concentrated on a single edge. A mere 1mm dip in the subfloor can cause a tile to flex under weight, which eventually leads to micro-cracks in the PU wear layer. By creating a smooth, monolithic base, we eliminate the microscopic movement that causes tiles to rub together and wear down from the inside out.
Why a Professional Fitter is Essential
Installing luxury brands like Amtico and Karndean requires more than just a steady hand. Our professional LVT flooring installation in Rayleigh involves a meticulous process of checking moisture levels and selecting the correct high-temperature adhesives. This prevents the tiles from shifting, which is a common cause of "peaking." When a floor peaks, the edges of the planks are forced upwards, making them extremely vulnerable to being caught and scratched by vacuum cleaners or shoes.
Our "showroom to you" service ensures you get the right material for your room's specific traffic levels, backed by twenty years of industry expertise. We take pride in the invisible work that happens beneath your tiles, knowing it's the only way to guarantee a floor that lasts twenty years or more. If you want to ensure your new floor is fitted with the integrity it deserves, book a complimentary assessment with our family-run team today.
Long-term Protection: When to Refurbish or Call the Experts
Even with the most meticulous care, a floor that has lived through a decade of family life will eventually show signs of its service. The beauty of Luxury Vinyl Tiles lies in their inherent resilience; unlike many other materials that require total replacement once worn, LVT allows for targeted restoration. Knowing how to prevent scratches on LVT flooring is your primary daily goal, but understanding when to call in a professional craftsman ensures your home remains a source of pride for twenty years or more. We believe in building floors that last, and that involves knowing how to treat them as they age.
Before taking action, you must distinguish between a surface scuff and a deep scratch. Scuffs are usually just rubber marks or light abrasions on the very top of the PU coating that haven't penetrated the design layer. You can often buff these out during a routine clean with a microfibre cloth. A scratch, however, is a physical groove you can feel with a fingernail. While these are more permanent, they don't have to mean the end of your floor's beauty.
Restoring the Wear Layer
The "Strip and Refresh" process is our professional secret for reviving a floor that has lost its original lustre. Over time, micro-scratches can dull the surface, making the design look cloudy. We use a specialist floor stripper to safely dissolve the old layers of dressing, lifting away embedded grime and light surface damage. Once the tiles are back to their raw state, we apply a fresh, high-performance professional dressing. This effectively restores the protective factory finish and can make a 10-year-old floor look brand new. For high-traffic Rayleigh kitchens or busy hallways, we typically recommend this deep maintenance every 1 to 2 years to keep the protection at its peak.
Tile Replacement and Professional Assessments
One of the greatest advantages of LVT is its modular nature. If a single tile suffers a deep gouge from a dropped kitchen knife or a heavy piece of furniture that's beyond refurbishment, we don't need to lift the whole room. As specialists, we can carefully remove the damaged plank and replace it with a fresh one. This "get out of jail free" card is why we always advise our Essex clients to keep a small stash of spare tiles from their original installation. It ensures a perfect colour and texture match, as manufacturing batches can vary slightly over the years.
Our commitment to your home doesn't end when the last tile is laid. We take genuine pride in helping our local community maintain the aesthetic transformation we've helped them realise. If you're unsure whether a mark can be buffed out or if it's time for a professional refresh, we're always happy to provide our expert opinion. Contact GW Flooring for a professional assessment or a new LVT installation quote and let's ensure your investment stands the test of time.
Protecting Your Investment for the Long Term
Ensuring your Luxury Vinyl Tiles remain in pristine condition is a rewarding partnership between professional craftsmanship and mindful daily habits. By prioritising meticulous subfloor preparation and selecting the correct wear layer thickness, you create a foundation that resists the pressures of modern life. Mastering how to prevent scratches on LVT flooring simply requires a commitment to a grit-free environment and using pH-neutral cleaning solutions that won't compromise the factory finish.
As a family-run business based in Rayleigh with over 20 years of expert installation experience, we take genuine pride in helping you realise your vision. We are specialists in subfloor preparation, ensuring the invisible work provides a perfect finish that stands the test of time. Whether you need a fresh installation or professional advice on maintaining your current floor, our team is here to support you every step of the way.
Book your free "Showroom to You" home visit in Rayleigh today to explore our premium collections in the comfort of your own home. Your floor is an investment in your home's character; with the right care, it will remain as beautiful and welcoming as the day it was fitted.
Frequently Asked Questions
Can I use a steam mop on my LVT flooring to keep it clean?
No, you should never use a steam mop on Luxury Vinyl Tiles. The intense heat can penetrate the joints and weaken the adhesive bond, which eventually causes the tiles to lift or "peak" at the edges. For a safe clean, stick to a damp microfibre mop and a pH-neutral solution recommended by manufacturers like Amtico or Karndean to maintain the floor's integrity.
Are pets claws likely to scratch my luxury vinyl tiles?
Pet claws can scratch the surface if they aren't kept trimmed, especially during high-speed play. While modern LVT is designed with a robust wear layer, a 20 mil or 0.55mm coating is the baseline for homes with large dogs. Keeping claws short and using rugs in play areas are the best ways to protect the PU coating from animal-related damage and ensure the floor remains pristine.
What is the best type of furniture pad for LVT floors?
Adhesive felt pads are the gold standard for protecting your floor from furniture. We advise against nail-on pads; if the felt wears down, the metal nail will gouge the vinyl immediately. Check your adhesive pads every few months to ensure they haven't collected grit. This is a vital step in how to prevent scratches on LVT flooring caused by moving chairs and tables.
How do I remove light scuffs without damaging the floor?
You can usually remove light scuffs using a soft microfibre cloth and a pH-neutral cleaning spray. For slightly more stubborn marks, a specialist LVT repair kit or even gently rubbing the area with a clean tennis ball can lift the residue without damaging the finish. Always avoid abrasive green scourers, as these will permanently dull the wear layer and leave visible cloudy patches.
Is it possible to repair a deep scratch in LVT without replacing the whole floor?
Yes, it is entirely possible to repair a deep scratch without replacing the whole floor. Because LVT is a modular system, a professional installer can lift the individual damaged tile and replace it with a new one. This is why we always suggest keeping a few spare planks from your original installation to ensure a perfect colour match during the repair process.
Why does my LVT floor look dull and scratched after only a few months?
Your floor likely looks dull due to a build-up of "mop and shine" products or the use of a vacuum beater bar. These products leave a sticky film that traps dirt; meanwhile, a spinning beater bar creates thousands of tiny micro-scratches. Switching to a "hard floor" vacuum setting and a pH-neutral cleaner is a key part of how to prevent scratches on LVT flooring from becoming permanent.
Should I choose a matte or gloss finish to hide scratches better?
Matte finishes are significantly better at hiding scratches than high-gloss options. Gloss surfaces reflect light more directly, which makes every micro-abrasion and scuff stand out. Lighter, matte wood-effect textures provide a more forgiving surface for busy Essex households, as the natural grain patterns and lower reflectivity help to camouflage daily wear and tear much more effectively than polished styles.
Will dragging a heavy appliance like a fridge ruin my LVT?
Dragging a heavy appliance like a fridge will almost certainly cause permanent damage or deep gouges. To move heavy items safely, you should always place a sheet of thin plywood or dedicated furniture sliders on the floor first. This distributes the weight and prevents the feet of the appliance from digging into the vinyl and ruining the meticulous subfloor preparation we provide during installation.


