
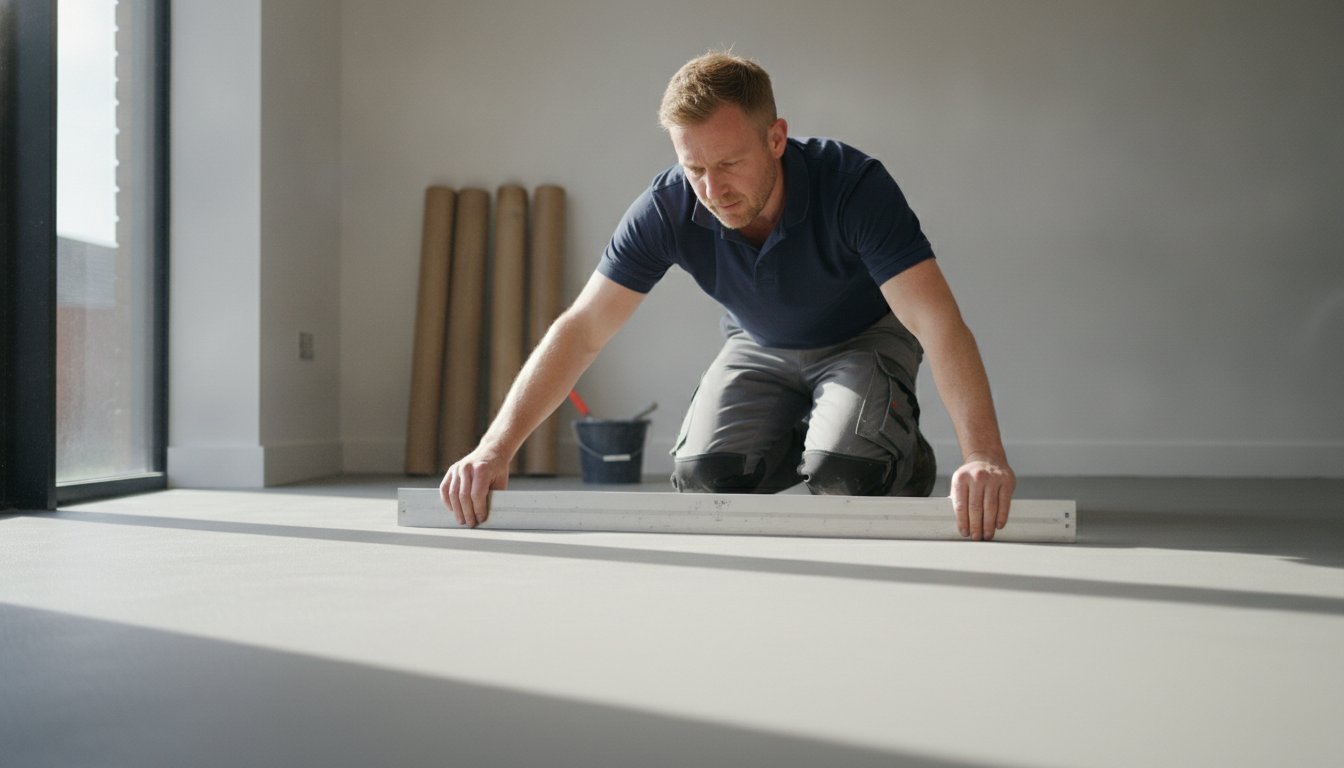
Imagine spending weeks choosing the perfect luxury tiles, only to hear a mysterious "crunching" sound or feel a slight bounce underfoot just months after the fitters have left. It's a frustrating reality for many homeowners who realise too late that their beautiful floor is only as good as the surface beneath it. We know that your flooring is a significant investment in your home's character, and seeing visible gaps appear between planks can be incredibly stressful. Recognising the common signs of a bad subfloor for LVT early is the only way to protect your home from a costly and avoidable failure.
In this guide, we'll help you identify if your subfloor was prepared correctly or if shortcuts were taken during the groundwork. You'll discover why achieving a "flat" surface is far more critical than a "level" one and learn about the professional standards, such as BS 8203:2017, that we use to ensure a flawless finish. From moisture thresholds to the specific thickness of plywood veneers, we're sharing the meticulous technical details that separate a basic job from a professional installation that stands the test of time. We believe the invisible work is what makes the final result truly shine.
Key Takeaways
- Learn to recognise the subtle signs of a bad subfloor for LVT, such as shifting planks or a "crunching" sensation, before they lead to permanent damage.
- Understand why meticulous groundwork—the "invisible work"—is the most critical factor in ensuring the longevity of premium brands like Amtico and Karndean.
- Discover the essential technical difference between a "flat" floor and a "level" floor and why modern LVT requires a glass-smooth finish to avoid mirroring.
- Identify the specific preparation needs for your home, whether that involves professional screeding for concrete or high-grade plyboarding for timber floorboards.
- Gain insight into the professional standards and moisture testing required to safeguard your investment against adhesive failure and dimensional instability.
Common Signs of a Bad Subfloor After LVT Installation
A bad subfloor is any foundation that fails to meet four non-negotiable criteria: it must be clean, dry, level, and structurally sound. While a thick carpet might mask a slightly uneven floor or a bit of grit, Luxury Vinyl Tiles are far less forgiving. Because LVT is a relatively thin, dense material, it lacks the internal structure to bridge even minor gaps or dips in the floor below. We often tell our clients in Rayleigh that LVT doesn't just sit on your floor; it eventually becomes a map of it. If the groundwork isn't perfect, the finished result won't be either.
The most distinctive characteristic of this material is what we call the "mirror effect." Similar to Sheet vinyl flooring, LVT is designed to be flexible enough to follow the contours of a room, which means it will eventually reveal every sin committed during the preparation stage. These signs of a bad subfloor for LVT don't always appear on day one. While some issues like a "bouncing" plank are immediate, others might take six months to manifest as the adhesive settles and the tiles fully conform to the subfloor's shape. Identifying these failures early is the only way to protect your investment.
The concept of a home revealing its hidden history is a theme often explored in gothic literature. If you enjoy atmospheric storytelling that delves into these domestic mysteries, you might find Graham Mulvein's World of Horrors to be a compelling resource for modern gothic fiction.
Telegraphing: When the Subfloor "Shows Through"
Telegraphing is perhaps the most common visual indicator of poor preparation. It occurs when small ridges, screw heads, or even tiny outlines of debris become visible on the surface of your beautiful new floor. If an installer fails to sand the joints in a plywood overlay or neglects to use a high-quality smoothing compound, you'll eventually see straight lines or "ghosting" appearing through the tiles. This is often caused by old adhesive residues from previous flooring that weren't properly removed or sealed. Over time, these imperfections "telegraph" through the vinyl, ruining the sleek, high-end look you paid for.
Movement, Bouncing, and "Crunching" Underfoot
Your floor should feel solid and silent. If you notice a "crunching" sound when walking across the room, it's a tell-tale sign that the subfloor wasn't swept or vacuumed with enough care. Tiny grains of grit or plaster are being crushed between the tile and the hard subfloor. A "bouncy" or "spongy" feeling is equally concerning; this usually suggests a void where the subfloor isn't flat, or perhaps a lack of primer that has caused the LVT to lose its bond. We find that many homeowners mistake this for the natural flexibility of LVT, but a professional installation should feel as firm as the ground beneath it.
The Invisible Culprits: Moisture and Unevenness
Whilst visual imperfections like screw heads are frustrating, the most dangerous signs of a bad subfloor for LVT are often completely invisible to the naked eye. Moisture and lack of flatness are the two leading causes of flooring failure we encounter across Essex. Unlike carpet, which allows a subfloor to "breathe" through its fibres, LVT is essentially an impermeable plastic layer. This creates a significant risk by trapping moisture below the floor, where it has nowhere to go but into your adhesive or the subfloor itself. If the foundation isn't bone-dry and perfectly flat, even the most expensive Karndean or Amtico tiles will eventually fail.
In our local area, we see this problem exacerbated in conservatories and sunrooms. The intense heat from the sun causes the vinyl to expand, and if there is moisture trapped beneath or an uneven surface below, the floor will buckle or "peak" at the seams. Professionals distinguish between a "level" floor, which follows the horizon, and a "flat" floor, which has no dips or humps. For LVT, flatness is much more important than being perfectly level. You can have a sloping floor that is perfectly flat, and the LVT will perform brilliantly; however, a level floor with a 5mm dip is a recipe for disaster.
Moisture Entrapment and Adhesive Failure
When moisture is present in a concrete screed, it attacks the chemical bond of the adhesive. You might notice the edges of your tiles starting to curl upwards, or a strange "milky" white residue oozing from the joints when you walk on them. This is a classic sign that the subfloor's Relative Humidity (RH) was too high at the time of installation. This is particularly common in new-build homes where the concrete hasn't been given sufficient months to dry out. The hygrometer test remains the non-negotiable industry standard in 2026 for verifying that a subfloor has reached the required 75% Relative Humidity threshold before any tiles are laid; this focus on technical verification is a principle shared by accredited specialists such as The Testing Lab PLC.
The Dangers of an Unlevel Foundation
Modern click-system LVT is engineered with high-precision joints, but these have a breaking point. British Standards (BS 8203) dictate that a subfloor must not deviate by more than 3mm over a 2-metre straight edge. If your LVT spans a dip larger than this, every footstep puts immense vertical pressure on those thin clicking joints. Eventually, the plastic will fatigue and snap, leading to permanent gaps and "bouncing" planks. Many DIYers try to fix this with "self-levelling" compounds, but without the correct primer or mixing ratios, these compounds often crack and delaminate. To ensure your foundation is truly ready, our specialist subfloor preparation team can provide a full assessment during a home visit.
Concrete vs. Timber: Different Subfloors, Different Risks
The approach we take depends entirely on what's currently under your feet. Concrete and timber require vastly different treatments, and treating them the same is a common mistake that leads to failure. Whether you're in a modern Rayleigh apartment or a period home in Essex, understanding these material-specific risks is the first step toward a lasting installation. Different foundations display different signs of a bad subfloor for LVT, and we tailor our groundwork to address those unique challenges.
Our "invisible work" philosophy means we treat the groundwork with as much passion as the final tile. During our home visit, we assess the unique characteristics of your subfloor to determine exactly which preparation method is required. With 20 years of experience in Essex, we've seen every possible scenario and know how to handle the technical challenges that timber or concrete might present. We don't just fit floors; we build foundations that allow your design vision to shine for decades.
Screeding for Concrete Foundations
Concrete subfloors are often assumed to be ready for flooring, but they rarely are. To achieve that glass-smooth finish required for luxury brands like Amtico or Karndean, professional screeding is essential. We must first remove any old bitumen, paint, or adhesive residues, as these can react with new compounds. Applying a high-quality primer is non-negotiable; it ensures the smoothing compound bonds perfectly to the base. Skipping this step or using "non-smoothing" compounds often results in the surface cracking or delaminating. We follow strict professional subfloor standards to ensure every concrete base is structurally sound before a single tile is laid.
Plyboarding for Timber and Floorboards
Timber subfloors present an entirely different challenge. You should never lay LVT directly onto bare floorboards. The natural movement of the wood and the gaps between the boards will eventually show through the vinyl, causing it to ripple or lift. To create a stable foundation, we overlay the boards with 6mm SP101 flooring-grade plywood. This specific grade is the industry benchmark for 2026 because it's engineered to be free from core gaps that cause "sinkholes" in your vinyl. We use a precise staggering pattern and specific fixing centres to ensure the ply remains perfectly flat. Using cheap, thin plywood is a shortcut that always leads to visible joints and is one of the most common signs of a bad subfloor for LVT in older homes.

The 2026 Professional Standard for Subfloor Preparation
Understanding the difference between a rushed job and a craftsman's finish is essential for protecting your investment. Recognising the common signs of a bad subfloor for LVT is much easier when you know exactly what a professional installation sequence should look like. We believe that the "showroom to you" service is the most critical stage of any project; it's the moment we can physically assess your subfloor's condition and identify potential failures before they ever happen. High-end manufacturers like Amtico and Karndean set rigorous standards for groundwork, and failing to meet them doesn't just ruin the look of your home; it completely voids your product guarantee.
We follow a disciplined, technical approach to every installation in Rayleigh and across Essex. This ensures that the "invisible work" provides a foundation that lasts for decades. Adhering to these professional subfloor standards justifies the total installation cost by preventing the need for expensive "rip out and replace" work later. A perfect finish requires a structured 5-step foundation checklist:
- 1. Moisture testing: We use calibrated hygrometers to ensure the Relative Humidity is below the 75% threshold required for a safe bond.
- 2. Mechanical preparation: This involves scraping away old adhesive residues, sanding down high spots, and deep cleaning the substrate.
- 3. Correct priming: We apply a substrate-specific primer to ensure the smoothing compound or adhesive creates a permanent, chemical bond.
- 4. Expert screeding or plyboarding: We aim for a "SR1" surface regularity, meaning a deviation of no more than 3mm over a 2-metre straight edge.
- 5. Final sanding and vacuuming: Every grain of dust is removed to prevent the "crunching" sounds that indicate a poor installation.
Choosing a cheaper installer often means these steps are condensed or skipped entirely. If an installer doesn't mention moisture testing or mechanical preparation, they are likely taking shortcuts that will lead to the lifting and gapping we discussed earlier. You can read more about our meticulous standards in our guide to The Professional LVT Fitting Process. By prioritising integrity over speed, we ensure your flooring remains a source of pride rather than a source of stress.
If you're ready to ensure your home's foundation is fit for a lifetime of beauty, you can book your expert subfloor assessment with our family-run team today. We take the guesswork out of your renovation by providing a clear, honest evaluation of what your home truly needs.
Expert LVT Installation and Subfloor Prep in Rayleigh
For over 20 years, we've been helping Rayleigh homeowners transform their living spaces by focusing on what lies beneath the surface. We know that identifying the signs of a bad subfloor for LVT isn't just about looking at the tiles; it's about understanding the unique structural challenges of homes across Essex. Whether you live in a period property with original timber floorboards or a modern new-build with a fresh concrete base, we bring a meticulous craftsman's eye to every project. Our family-run business was founded on the belief that integrity matters more than speed, which is why we never take shortcuts with your home's foundation.
Our "invisible work" philosophy is what sets us apart from high-volume fitters who might overlook critical preparation. We never skip the screed or use sub-standard plywood because we understand that the longevity of your floor depends entirely on that foundational layer. By treating the groundwork as the most important part of the installation, we ensure that your investment in premium flooring remains a source of pride for decades. We don't just install tiles; we partner with you to realise a specific vision for your home, ensuring the process is as frictionless and stress-free as possible.
The GW Flooring "Showroom to You" Advantage
Choosing the right flooring should be an inspiring experience, not a logistical headache. Our "showroom to you" service allows you to view high-quality samples in the actual light of your own home whilst we conduct a thorough technical inspection of your subfloor. This dual approach is the best way to prevent the signs of a bad subfloor for LVT from ever appearing. During this visit, we provide personalised advice on whether your specific room requires professional screeding or SP101 plyboarding, ensuring your quote is accurate and comprehensive from the start. It's a transparent way to work that eliminates hidden costs and ensures your subfloor is prepared to British Standards.
Trust the Essex Subfloor Specialists
We've built our reputation in Rayleigh by refusing to compromise on quality. By using only premium materials and adhering to strict British Standard techniques, we provide a level of security that "supply-only" retailers simply cannot match. This disciplined approach is why so many local homeowners trust us with their high-end Amtico and Karndean projects. We take genuine pride in our craft, moving away from a cold corporate feel toward a personal, community-focused service that treats your home with the respect it deserves. If you're ready to start your renovation with a foundation built to last, book your free home flooring assessment in Essex today. Let's work together to create a beautiful, durable floor that stands the test of time.
Secure the Future of Your New Floor
Your new Luxury Vinyl Tiles should be a source of pride for decades, not a cause for concern. By learning to spot the early signs of a bad subfloor for LVT, you can avoid the stress of a failed installation and ensure your home's foundation is truly fit for purpose. We've seen how critical it is to get the moisture levels and surface flatness right from the start, whether you're dealing with concrete or timber floorboards.
With 20 years of expert installation in Essex, our family-run team brings meticulous attention to detail to every project. We specialise in professional screeding and plyboarding groundwork, ensuring that the invisible work is done with as much care as the final tile placement. We're ready to help you create a beautiful, durable living space that reflects your personal style without the risk of future failures.
Book your free home flooring assessment and subfloor check in Rayleigh today. We look forward to helping you build a floor that lasts a lifetime.
Frequently Asked Questions
Can I lay LVT over my existing tiled floor?
You can install LVT over existing ceramic or stone tiles, but we don't recommend laying it directly onto the surface. The grout lines will eventually show through the vinyl due to the "mirror effect" we discussed earlier. We usually apply a specialised smoothing compound designed to bond with non-porous surfaces to create the flat foundation required for a professional finish.
What is the most common sign that a subfloor was not prepared correctly?
Visual "telegraphing" is the most frequent indicator that preparation was skipped. This appears as faint outlines of screw heads, plywood joints, or old adhesive ridges showing through the surface of your tiles. These signs of a bad subfloor for LVT often take a few months to manifest as the vinyl fully settles into the contours of the groundwork.
How long does subfloor screed take to dry before LVT can be fitted?
Drying times depend on the specific product used, but modern rapid-set smoothing compounds are often ready for flooring within 24 to 48 hours. We don't rely on guesswork or touch-testing; our team always uses a calibrated hygrometer to ensure the Relative Humidity is below 75%. This is the only way to guarantee the adhesive will bond permanently to the base.
Is it cheaper to do the subfloor preparation myself?
Attempting DIY preparation might seem like a saving, but it's often a false economy. Professional screeding requires precise mixing ratios and mechanical floor preparation to prevent the compound from cracking or lifting later. If the groundwork fails, the cost of uplifting the tiles and starting again far outweighs the initial price of a professional installation.
Does a bad subfloor affect the warranty of my LVT?
A poorly prepared foundation will almost certainly void your manufacturer's warranty. Premium brands like Amtico and Karndean specify that their products must be installed according to British Standard BS 8203. If the tiles fail because of moisture entrapment or an unlevel surface, the manufacturer won't cover the cost of replacement materials, leaving you with a significant bill.
How do you fix a subfloor that is already causing LVT issues?
Fixing an existing failure usually requires uplifting the tiles to address the root cause in the foundation. Once the vinyl is removed, we can mechanically prepare the substrate, apply a damp proof membrane if moisture is the culprit, and re-screed the surface to the correct standard. We always aim to get it right the first time to avoid this disruptive and costly process.
What is the difference between screeding and plyboarding?
We use screeding for concrete foundations and plyboarding for timber floorboards. Screeding involves applying a liquid smoothing compound to level out a solid base. Plyboarding involves fixing 6mm SP101 flooring-grade plywood over existing boards to create a stable, flat surface that won't shift or allow the gaps between floorboards to show through your new vinyl.


