Your stunning new luxury vinyl tiles are only as good as the floor you cannot actually see. We know how much pride you take in your home, and we also understand the genuine worry that rising renovation costs or visible imperfections like "telegraphing" can cause. It's perfectly natural to feel a bit overwhelmed by the technical choice between screeding and plyboarding, especially when you simply want a beautiful, smooth finish that stands the test of time.
We believe that meticulous subfloor preparation for vinyl tiles is not just an optional extra; it's the most vital part of the entire installation. By focusing on this essential groundwork, we ensure your floor achieves a professional standard of perfection, providing a luxury result that stays flawless for 20 years or more. This article explains exactly why this foundational step is worth the investment and clarifies the professional methods we use to transform your living space into something truly special.
Key Takeaways
- Learn why expert subfloor preparation for vinyl tiles prevents the "telegraphing effect" from ruining your new floor's appearance over time.
- Understand the critical differences between screeding for concrete and plyboarding for timber to ensure a perfectly level base for your LVT.
- Discover why moisture testing with a hygrometer is a non-negotiable step for protecting your home against the hidden dangers of rising damp.
- See how investing in professional foundational work now can extend the lifespan of your luxury vinyl tiles by two decades or more.
- Gain total clarity on the professional installation process so you can make informed decisions about your home renovation budget.
Why Subfloor Preparation for Vinyl Tiles is Non-Negotiable
We often tell our clients in Essex that the luxury vinyl they've chosen is simply the aesthetic skin; the real floor is what lies beneath. Subfloor preparation for vinyl tiles is the meticulous process of creating a foundation that is perfectly level, structurally stable, and entirely dry. Without this essential groundwork, even the most expensive flooring will eventually fail. We take genuine pride in this "invisible work" because we know it is the difference between a floor that looks good for a month and one that stays flawless for decades.
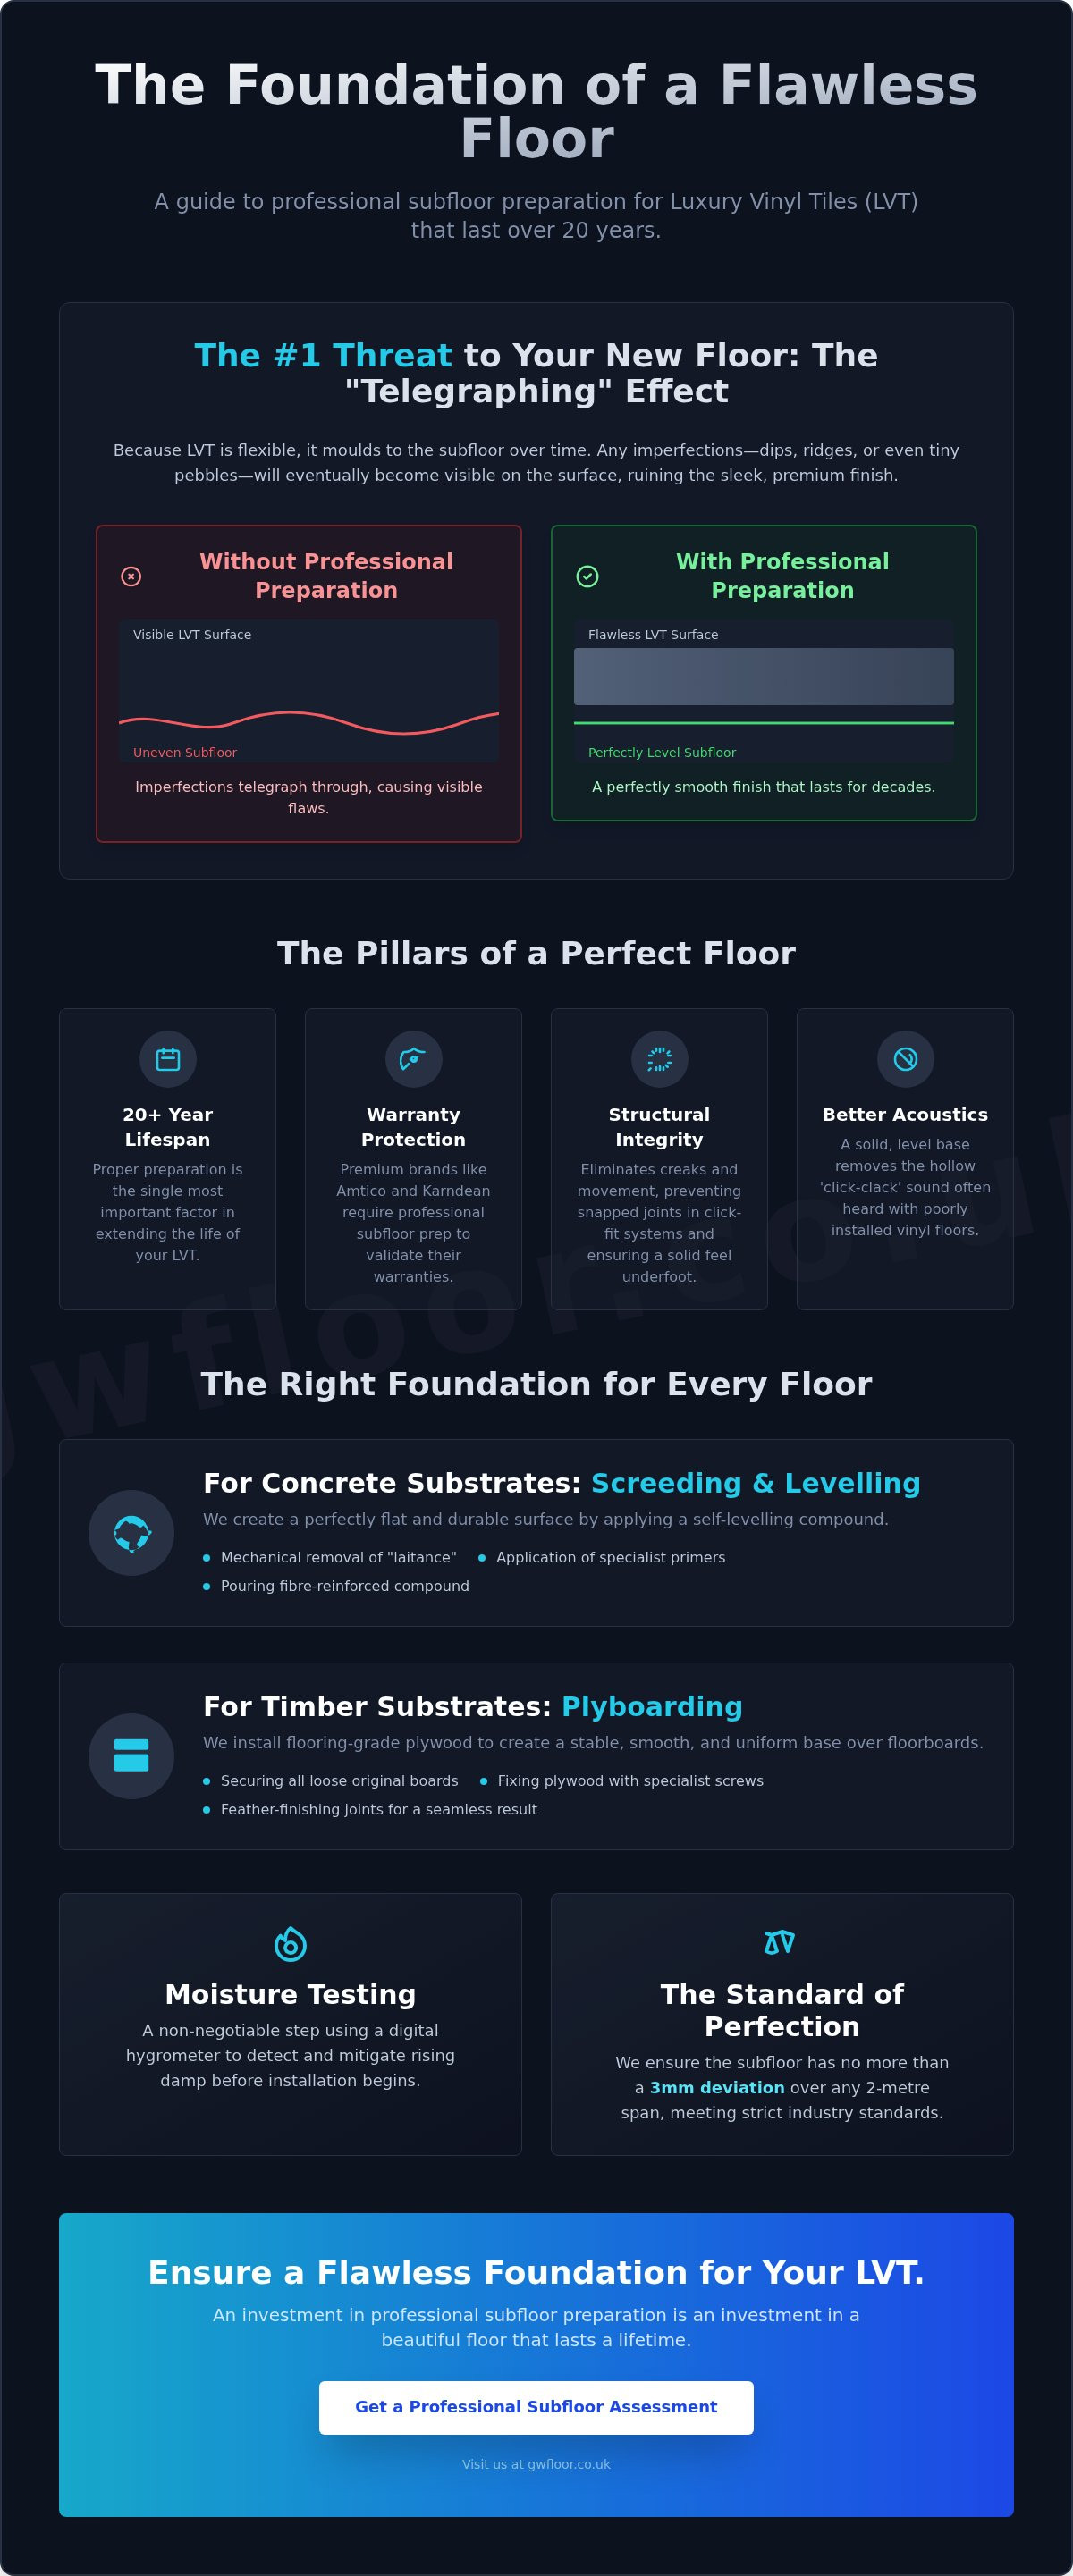
One of the most common frustrations homeowners face is the "telegraphing effect." Because modern luxury vinyl is designed to be flexible, it eventually moulds itself to the exact shape of the substrate. If there is a tiny pebble, a ridge of old adhesive, or a slight dip in the concrete, those imperfections will eventually "telegraph" through to the surface. This ruins the sleek, high-end look you've worked hard to achieve. Whilst LVT is the modern standard for residential homes, its predecessor, Vinyl composition tile (VCT), also required a very smooth subfloor to prevent cracking and lifting. The principle remains the same today: the smoother the base, the better the finish.
Protecting your investment is about more than just aesthetics. When you choose premium brands like Amtico or Karndean, you are paying for world-class design. However, these manufacturers have strict installation guidelines. Professional subfloor preparation for vinyl tiles is often a requirement for maintaining your product warranty. If the groundwork isn't up to standard, you may find yourself unprotected if the tiles begin to lift or gap in the future.
The Mechanics of Floor Failure
Subfloor dips are the primary enemy of click-fit vinyl tiles. When a floor isn't level, the weight of someone walking creates a "bridge" over the hollow spot. This puts immense pressure on the delicate clicking mechanisms, leading to snapped joints and unsightly gaps. Similarly, adhesive won't bond correctly to a dusty or porous old substrate. We ensure every surface is correctly primed to create a permanent bond, eliminating the risk of tiles shifting or "popping" over time. Proper preparation also improves sound insulation, removing the hollow "click-clack" sound that often plagues poorly installed floors.
Aesthetics vs. Structural Integrity
There is a significant difference between a floor that looks flat to the eye and one that is truly level. Our team uses precision tools to ensure the substrate meets industry standards, typically allowing for no more than a 3mm deviation over a 2-metre span. This level of discipline is what eliminates annoying creaks and movement whilst you walk. It provides that solid, premium feel underfoot that distinguishes a professional installation. We aren't just laying a floor; we are building a structural foundation that supports the comfort and beauty of your home.
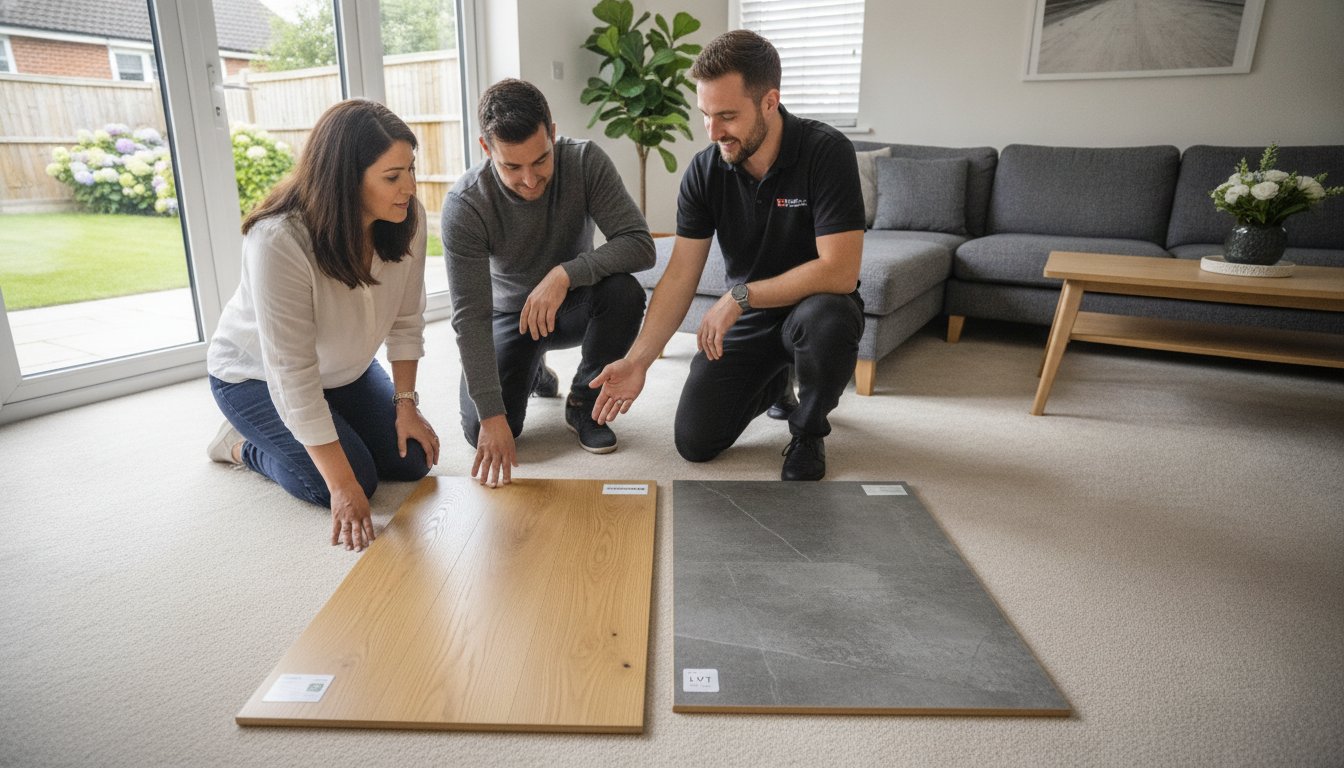
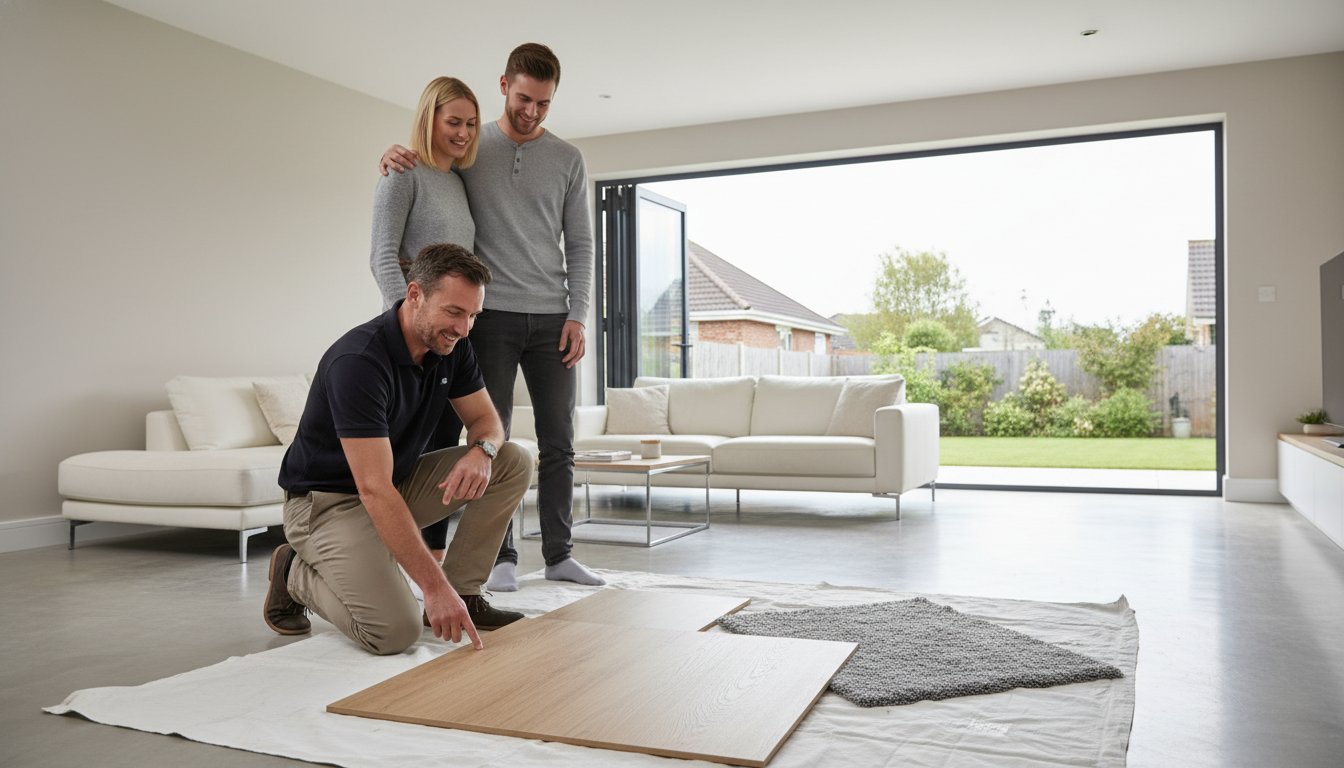
Assessing Your Current Floor: Concrete vs Timber Substrates
In our experience working across Essex homes, we encounter a diverse range of foundations, from original Victorian floorboards to modern power-floated concrete. Every successful project begins with a meticulous assessment of these substrates. We don't just look at the surface; we look for the history of the house. We check for loose boards, structural cracks, or any lingering scent of historic damp that could compromise your new floor. Whilst it's tempting to take shortcuts, we always advocate for a "clean slate" approach. This means removing old carpets, vinyl, or ceramic tiles rather than laying over them. This is the only way to guarantee that the subfloor preparation for vinyl tiles creates a bond that lasts for decades.
Installing luxury vinyl over existing tiles or floorboards is a common suggestion in DIY circles, but it carries significant risks. Old materials can hide moisture or become unstable under the weight of new furniture. If you're unsure what lies beneath your current floor covering, we can provide a professional subfloor assessment to give you total peace of mind before you invest in your new LVT.
Working with Concrete and Screed
Concrete floors often appear ready for installation, but they frequently require specialised attention. We evaluate the porosity and strength of existing sand-cement screeds to ensure they can support a new levelling layer. A common issue we find is "laitance," which is a weak, friable layer of fine particles on the surface of new concrete. This must be mechanically removed because it prevents primers and compounds from bonding. For deeper troughs or significant height differences, we utilise professional techniques for concrete subfloors to build up the level gradually. A simple skim coat isn't enough when the structural integrity of the base is at stake.
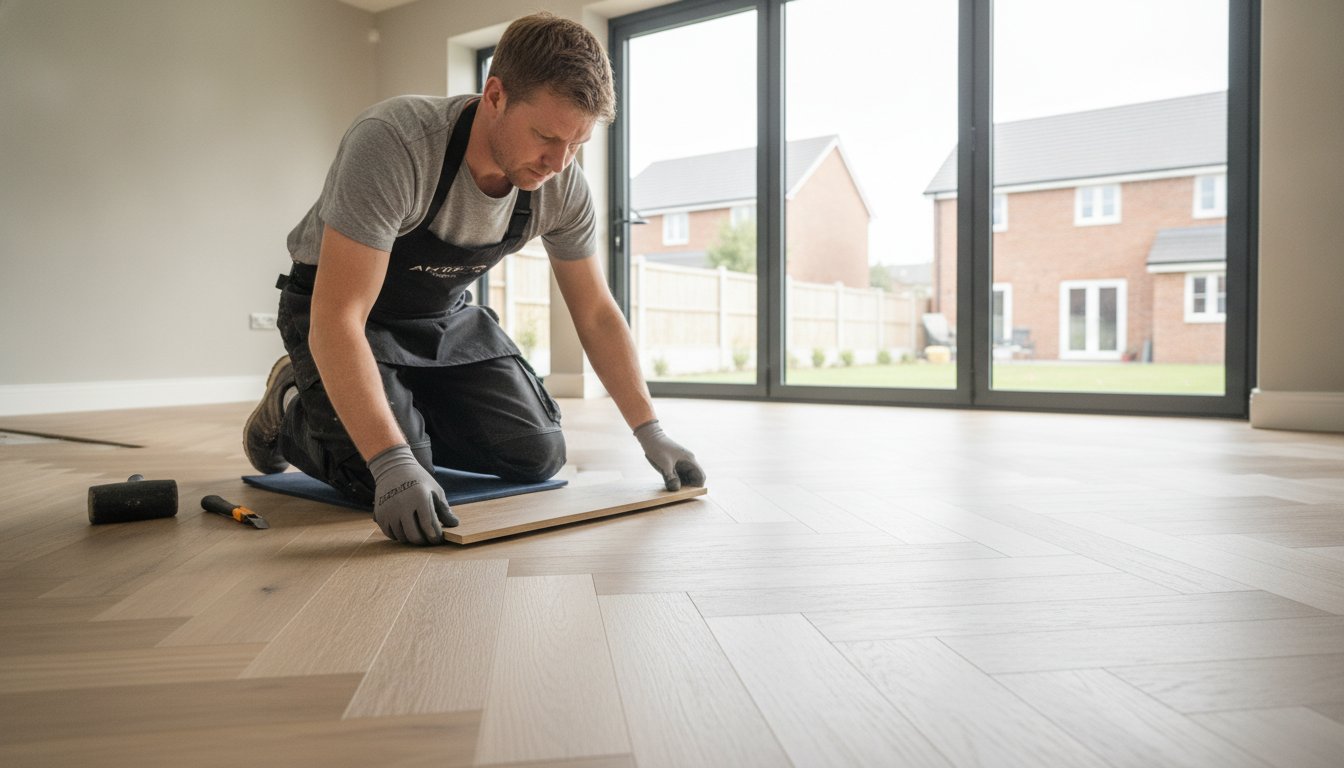
Preparing Timber and Plywood Bases
Timber subfloors present a different set of challenges, primarily related to movement. Standard DIY-grade plywood is insufficient for luxury vinyl tile installations because it often contains internal voids or low-quality glues that can delaminate. We use flooring-grade plywood, fixed with a specific screw pattern (typically every 100mm to 150mm) to ensure the base is rock solid. We then "feather" the joints using a rapid-drying compound to eliminate any visible lines between the sheets. This discipline prevents tiles from popping or gapping as the house naturally settles, ensuring your floor remains as silent and stable as the day it was fitted.
Professional Techniques: Screeding and Plyboarding Explained
Once we have assessed the substrate and cleared the area, the real transformation begins. Professional subfloor preparation for vinyl tiles relies on two primary techniques: screeding for solid bases and plyboarding for timber. Whilst some online tutorials suggest these are simple DIY tasks, the reality involves a high level of technical precision and specific material chemistry. We treat this stage with the same care as the final tiling because any error here will inevitably show on the surface. We use premium smoothing compounds and flooring-grade materials to ensure the bond between your subfloor and your new luxury vinyl is permanent and perfectly flat.
The science of priming is often the most overlooked part of the process. We never apply a smoothing compound directly to an old substrate without a dedicated primer. This liquid layer acts as a bridge; it seals the porous surface of the concrete or timber to prevent the compound from drying too quickly and cracking. It also ensures the new layer grips the old one with maximum strength. Without this "invisible" bond, your floor could eventually delaminate, leading to hollow sounds or loose tiles.
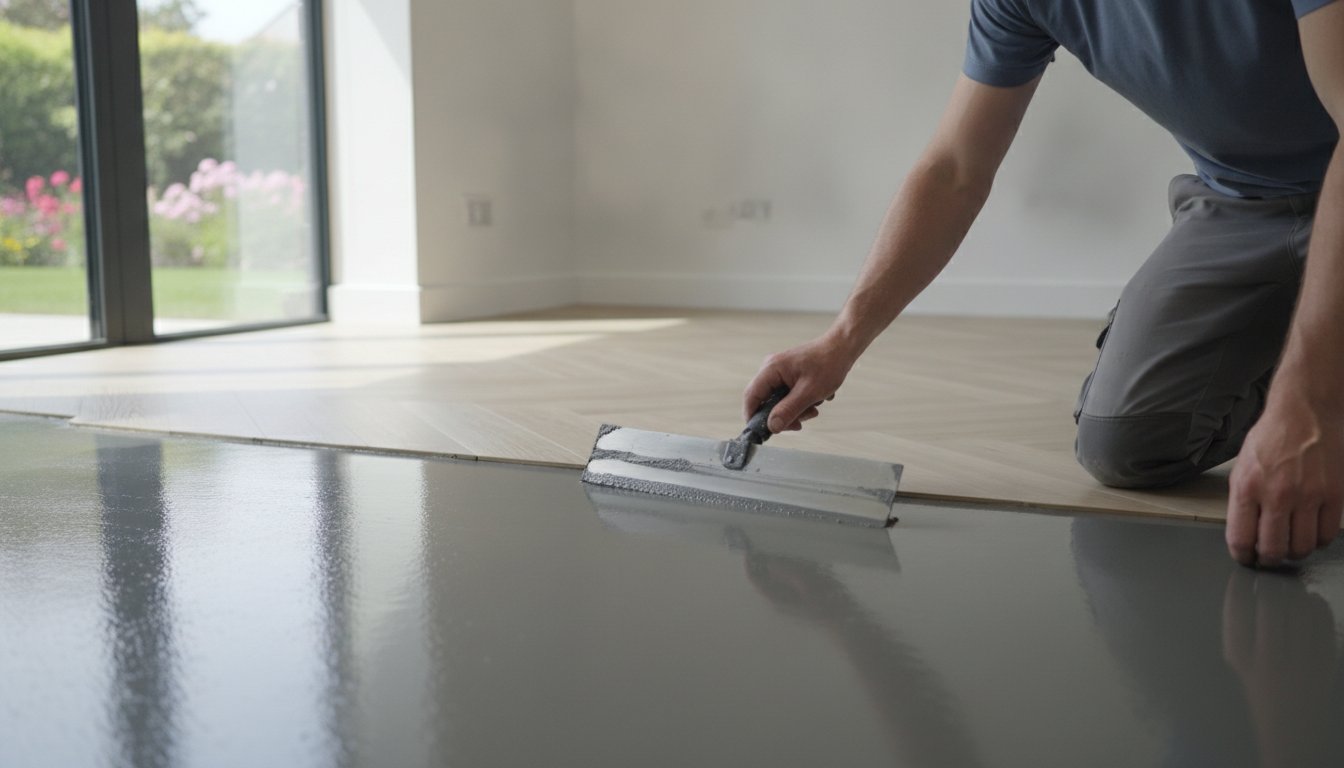
The Screeding Process for Concrete
Achieving a glass-like finish on a concrete floor requires more than just pouring a bag of leveler. We begin with mechanical preparation, ensuring the surface is free of any contaminants. We then mix the smoothing compound to a precise consistency. If the mix is too thin, it loses structural strength; if it's too thick, it won't flow into the tiny dips that cause "telegraphing." We pour and trowel the mix to create a seamless surface that meets the SR1 standard. Patience is vital here. Rushing the drying time is the most common cause of installation failure, as trapped moisture can later affect the adhesive.
Plyboarding for a Stable Timber Base
Timber floors require a different approach to eliminate movement. We exclusively use SP101 flooring-grade plywood, typically in a 6mm thickness, rather than standard construction ply. SP101 is engineered specifically for LVT installations; it features a superior core that won't delaminate or "bleed" oils into your new tiles. Before fixing, we allow the plywood to acclimatise to your home's environment for at least 24 hours. We then secure the sheets using ring-shank nails or specific flooring screws at 100mm centres. This dense fixing pattern ensures the base is rock-solid and won't creak or shift as you walk.
The final touch in our preparation is the art of "feathering." This involves using a rapid-setting internal patch to smooth over every screw head and plywood join. We also use this technique to create seamless transitions between different rooms or floor types. This meticulous attention to detail ensures that when we finally lay your luxury vinyl tiles, they sit on a surface that is as smooth as a billiard table.
Managing Moisture and Underfloor Heating Requirements
Many Essex properties, particularly older homes in areas like Rayleigh or Leigh-on-Sea, sit on ground-floor concrete slabs that were built without modern damp-proof courses. This creates a risk of "rising damp," where moisture travels through the porous concrete and becomes trapped under your new floor. This is where professional subfloor preparation for vinyl tiles proves its worth. We don't rely on visual checks; we use digital hygrometer tests to measure the Equilibrium Relative Humidity (ERH) of your substrate. If you're concerned about damp in your home, we can provide a professional moisture assessment as part of our initial site visit to ensure your installation is safe.
The danger of moisture isn't just about smell or mould. When moisture is trapped beneath an impermeable layer of vinyl, it builds up pressure and causes the adhesive to "re-emulsify." This means the glue turns back into a liquid state, leading to bubbling, tiles lifting, and eventually a total floor failure. According to British Standards (BS 8203), a subfloor must have a reading of 75% RH or lower before any resilient flooring is installed. If your floor exceeds this threshold, we apply a liquid Damp Proof Membrane (DPM). This epoxy-based resin creates a permanent, waterproof barrier that allows us to proceed with the installation without fear of future damp issues.
Moisture Testing and DPM Solutions
Applying a liquid DPM is a precise task that requires a clean, mechanically prepared surface to ensure a perfect bond. Once applied, it effectively "sandwiches" any moisture within the slab, protecting the smoothing compound and the vinyl tiles above. This process is essential for ground-floor renovations where the history of the subfloor is unknown. It provides the security that your investment won't be ruined by invisible environmental factors years down the line.
Integrating Underfloor Heating (UFH)
Underfloor heating adds a layer of complexity to the preparation process. The thermal expansion and contraction caused by temperature changes can put immense stress on the bond between the tile and the subfloor. Because of this, we use specific high-temperature adhesives and fibre-reinforced screeds that are designed to remain flexible. We also guide our clients through the vital "commissioning" process. This involves slowly increasing the floor temperature by no more than 5°C per day until the maximum operating temperature is reached. This disciplined approach allows the materials to settle naturally, preventing the tiles from warping or popping due to sudden heat shocks.
Why Professional Subfloor Preparation Saves You Money
We understand that home renovations are a significant investment, and it's natural to look for ways to manage the budget. However, cutting corners on subfloor preparation for vinyl tiles is often the most expensive mistake a homeowner can make. When we talk about the cost of a floor, we aren't just looking at the initial quote. We're looking at the total cost over twenty years. A professional installation, supported by meticulous foundational work, ensures your luxury vinyl lasts for decades, whilst a rushed job might require a total replacement in just a few short years.
Investing in the invisible layers of your floor is what guarantees the longevity of the visible ones. By ensuring the substrate is perfectly level and dry, we prevent the structural stresses that cause tiles to gap or click systems to fail. This disciplined approach means you won't be paying for repairs or early replacements. It's about doing the job once and doing it right, giving you the security and pride that comes with a high-quality finish.
The Real Cost of DIY Mistakes
The real cost of a failed installation is often double the original investment. Removing failed, glued-down LVT is a messy, time-consuming nightmare that can even damage your original subfloor if improper removal methods are used. If an old adhesive wasn't correctly stripped or a vital primer was skipped, the tiles will eventually lift and shift. The labour required to scrape back ruined compound and adhesive is far more expensive than the cost of professional preparation. Our team provides a professional installation guarantee, offering you total peace of mind that your home is in safe hands.
Choosing GW Flooring in Essex
As a family-run business with 20 years of Rayleigh expertise, we've encountered every technical challenge an Essex subfloor can present. We take genuine pride in our "invisible work" because we know it's the secret to a flawless result. Our "Showroom to You" service is designed to make the process frictionless; we visit your home in person to assess your subfloor and provide an accurate, transparent quote. This personal touch ensures there are no hidden surprises once the old floor is lifted.
We believe in being creative partners as well as technical experts. To help you understand the full journey of your home transformation, we recommend reading The Essential Guide to Professional Floor Installation in Rayleigh and Essex. This resource explains our commitment to quality and what sets a professional installation apart from the rest. Book your free home assessment today to ensure your subfloor is perfectly prepared for the luxury finish you deserve.
Secure Your Dream Floor Today
Achieving a luxury finish isn't just about selecting the perfect aesthetic; it's about the discipline of the "invisible work" beneath your feet. We've explored how professional techniques like precision screeding and hygrometer moisture testing prevent common failures like telegraphing and bubbling. By prioritising quality subfloor preparation for vinyl tiles, you ensure your investment remains beautiful and structurally sound for decades to come. It's the difference between a temporary fix and a permanent home transformation.
As a family-run business with over 20 years of local Essex expertise, we refuse to take shortcuts that compromise your home's integrity. We are specialists in Amtico and Karndean preparation, ensuring every floor we lay meets the highest industry standards of craftsmanship. Our team takes genuine pride in helping you realise your vision with a foundation that is built to last. We're ready to bring our expertise directly to your door.
Book Your Free Rayleigh Home Flooring Assessment to begin your journey toward a flawless finish. We look forward to helping you transform your living space with total confidence and pride.
Frequently Asked Questions
Can I lay vinyl tiles directly over my old floor tiles?
We strongly advise against laying luxury vinyl directly over old ceramic or porcelain tiles. Whilst the old surface might look flat, the grout lines will eventually "telegraph" through to your new floor, creating visible grid lines on the surface. Removing the old tiles allows us to start with a clean slate and ensures the new subfloor preparation for vinyl tiles creates a permanent, smooth bond that won't fail as the building settles.
How long does it take for floor screed to dry before laying LVT?
Drying times depend on the specific compound used and the environmental conditions in your home. Most modern smoothing compounds are walkable within two to three hours, but we typically allow 24 hours before laying the final floor. Rushing this stage is a common mistake; if the moisture hasn't fully evaporated, it can trap dampness under the tiles and cause the adhesive to fail later on.
What is the best plywood to use for subfloor preparation?
SP101 flooring grade plywood is the only material we recommend for timber substrates. Unlike standard DIY plywood, SP101 is engineered with a superior core and higher quality glues that won't delaminate or bleed oils into your luxury vinyl. Using the correct grade ensures your floor remains stable and silent, preventing the creaks and movement that often plague lower-quality installations.
Do I need to remove my skirting boards before subfloor preparation?
Removing your skirting boards isn't strictly mandatory, but it's the only way to achieve a truly seamless finish. By removing them, we can ensure the subfloor prep and the tiles go right to the wall, allowing the skirtings to sit on top of the new floor. If you prefer to leave them in place, we use a colour-matched beading to cover the expansion gap, though this creates a slightly different aesthetic result.
Why is my new vinyl floor showing bumps from the subfloor?
Bumps appear because of a phenomenon called "telegraphing," where the flexible vinyl eventually moulds itself to the shape of the substrate. If the subfloor preparation for vinyl tiles wasn't meticulous, tiny pebbles, old adhesive ridges, or uneven joints will eventually show through. This is why we place so much emphasis on the "invisible work" of cleaning and smoothing the base before the first tile is even touched.
How do I know if my concrete floor has a moisture problem?
You cannot tell if a concrete floor is dry just by looking at it or touching the surface. We use a professional digital hygrometer to measure the Relative Humidity (RH) within the slab. If the reading is above 75% RH, it indicates a moisture problem that requires a liquid damp proof membrane. This is a vital check for any ground-floor renovation to prevent future bubbling and adhesive failure.
Is self-levelling compound the same as a structural screed?
Self-levelling compound is a smoothing layer, not a structural one. Structural screeds are thick layers of sand and cement used to create the main floor slab, whilst smoothing compounds are thin, polymer-rich layers (typically 3mm to 10mm) used to create a glass-like finish. We use these compounds to refine the surface and eliminate the minor imperfections that would otherwise ruin the look of your luxury vinyl tiles.
Can I use a standard underlay instead of subfloor preparation?
Standard underlay is not a substitute for proper subfloor preparation. Whilst some click-fit products come with an integrated acoustic backing, they still require a substrate that meets the SR1 standard for flatness. Underlay cannot fix a floor that is unlevel or structurally unstable. If you ignore the foundational prep, the joints in your vinyl tiles will eventually snap under the pressure of walking over hollow spots.